The 5D can't over crank at his stage although users are optimistic about a firmware upgrade that will allow it in the future. The 7D can record up to 60 fps in 720p. Under cranking however is easy with the addition of an inexpensive shutter remote / timer like this.
I bought mine on trademe for NZ $65. It allows me to take a single exposure every 1 second - 100 hours. You can make it do this infinitely until the battery runs out which is approximately 2 months of constant use.
You can also use it as a Timer Delay which allows you to set the time between when you trigger the remote and when the the camera shoots - up to 10 hours.
You can also set the duration of the exposure when the camera is set to Bulb - up to 10 hours.
Here is an example of a time lapse I shot this morning at the Ports of Auuckland.
How I did it:
Obviously you will need to use a tripod if you want your movie to look steady. Set up your shot as you normally would keeping in mind that we as viewers are used to seeing a bit of motion blur which means keeping the shutter speed down in the 50-100th of a second range. On a bright sunny day this means closing down the iris.. a lot. But if this is giving an undesirable effect to your image then you may like to employ a ND filter to cut down the light coming in to your camera.
Set you remote timer appropriately. The above time lapse was set at one exposure per second. If the action is very slow such as the stars or a flower blooming you will want to make the interval a bit longer.
I usually set my picture quality to large jpeg and then snap away. I usually turn off the Live View mode saving the camera power and effort but in the instance above I left it on so I could review the shots as they came in, though this can also be done through the view finder.
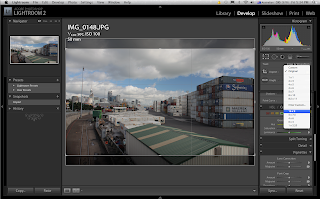
 Once completed I ingest my photos via Adobe Lightroom > Make any adjustments to one the images in the Develop section > Apply a 16:9 crop factor to that same image > Control click (right click PC) the image and under Develop Setting select Copy Settings > Select all the images of the time lapse > Control click and paste settings > With all images still selected Control click and select Export > Make a new folder and resize the image with a longest edge of 1920 pixels (1080 HD) > exit Lightroom and open QuickTime Player 7
Note: QuickTime Player 7 is included with Final Cut Studio HD.
In QT7 click File and select Import Image Sequence > navigate to the folder containing the images exported from Lightroom and select the first image file hit open. You should see your time lapse. Then export it is any format you choose.
Note: This is the way that I have done it and may be one of many ways to create time lapses.

No comments:
Post a Comment